 ??
?? English
 Bahasa Indonesia
 ???
??? Espanol
How to configure the backup service to back up my servelet?
In this article, we would like to show you how to configure the backup service to backup your servelet.
- The online backup server needs to communicate with backup agent (which will be installed on your server) on port 1167. If you run firewall services on your servelet (e.g. iptables / firewalld / ufw on Linux, or Windows Firewall on Windows), please configure the firewall to allow incoming traffic on port 1167.
- Install the R1Soft Backup Server Manager agent on your servelet / server you want to backup. More details on how to install the backup agent on your server can be found on R1Soft documentation at below URL:
For Ubuntu and other Debian-based Linux OS: http://wiki.r1soft.com/display/ServerBackup/Install+Backup+Agent+on+Debian+and+Ubuntu+manually
For CentOS and other Fedora-based Linux OS: http://wiki.r1soft.com/display/ServerBackup/Install+Backup+Agent+on+CentOS%2C+RHE%2C+and+Fedora+manually
For Windows Server OS: http://wiki.r1soft.com/display/ServerBackup/Install+Backup+Agent+on+Windows - Login to SimplerCloud client area portal and go to your servelet's control panel. Take note the hostname, IP address and root password.
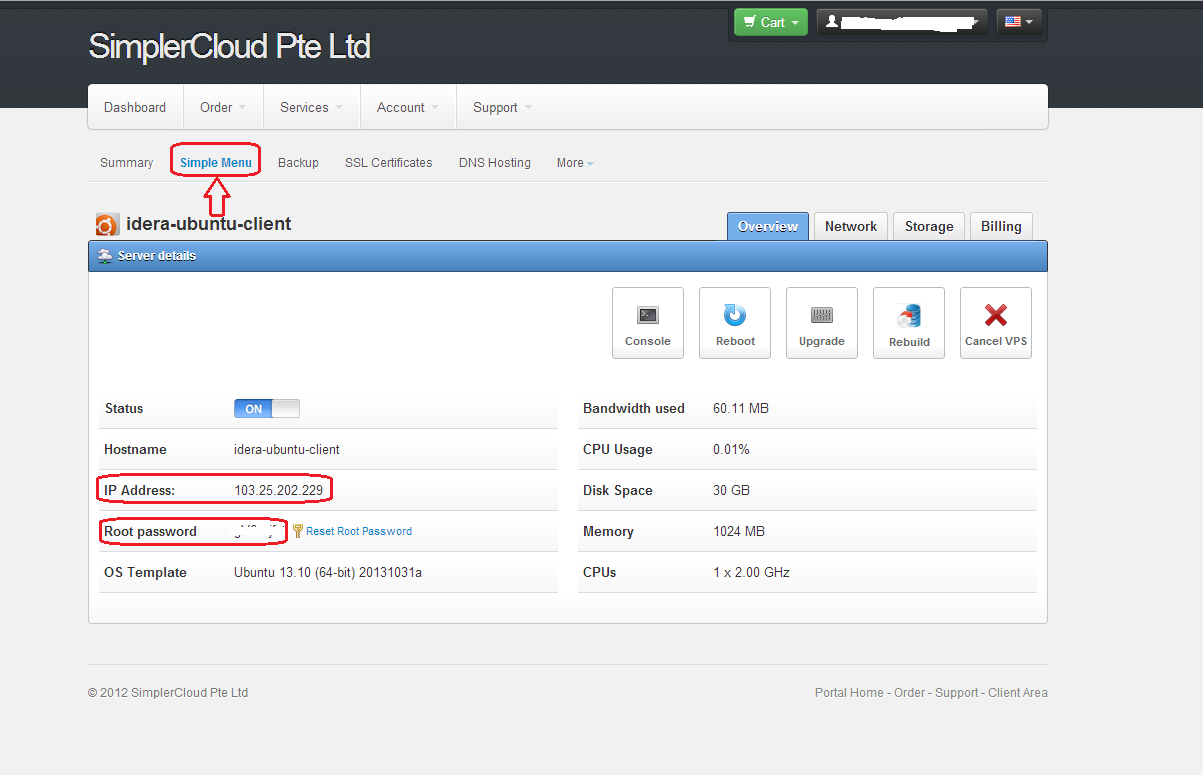
Figure 1. Simple Menu on Simpler Cloud Dashboard
- Go back to your Online backup portal dashboard, Click on "Servers" on the below left section, and then click "Add Server" icon at the left pane on the Agents section.

Figure 2. Add Server from Idera backup portal dashboard
- Type the Server Name and IP Address of your servelet based from the information taken from Simple Menu on SimplerCloud dashboard. Port 1167 is the default port, so you don't need to change it. Continue by clicking Create.
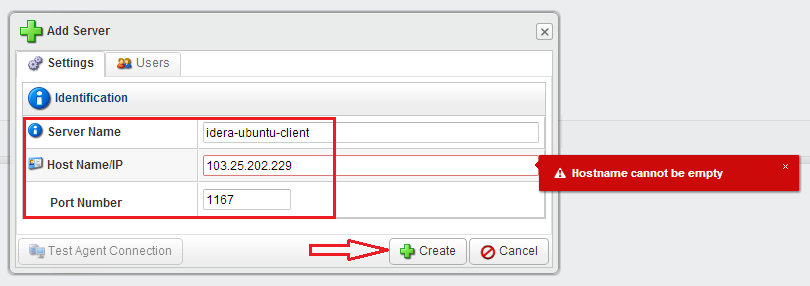
Figure 3. Type serverlet's hostname and ip address on Idera backup portal dashboard
- Wait and click "OK" after the process is completed.
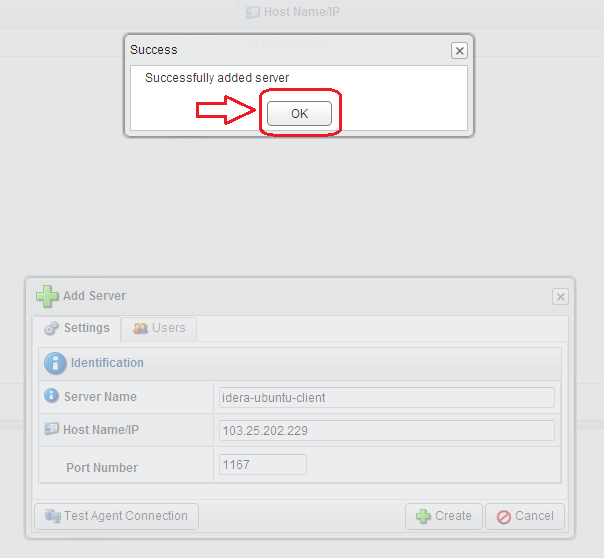
Figure 4. Click OK after the process is completed
- The servelet is now added in Idera server list.

Figure 5. The Servelet is now added in Idera server list
- The next step is to Deploy agent remotely to servelet. In order to do that, from Idera backup portal dashboard, click "Deploy agent" icon.

Figure 6. Deploying agent remotely to servelet from Idera backup dashboard
- There will be windows pop-up menu of Administrative Credentials shows up. Fill in servelet's username (root for Unix server, and administrator for Windows server) and its password. Take note that if you want to deploy the agent to a Windows server, you would need to tick "Reboot Windows Servers after deployment" since for Windows, the changes will not take effect until the server is rebooted. You also need to disable Windows Firewall or open up the port 1167 on the firewall. Leave other settings as default and click "OK".

Figure 7. Administrative Credentials windows pop-up
- You will see a message saying that agent deployment is scheduled. Click "OK". However, this doesn't mean that the deployment is completed. You need to wait for several minutes until the deployment is completed.
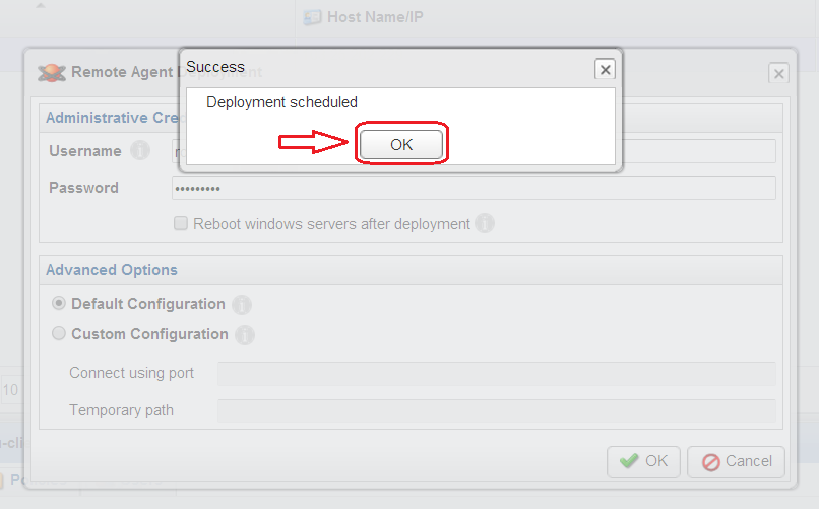
Figure 8. Deploy agent task is completed
- You can check whether the deployment is completed by using the "Test Agent Connection" button as shown on below screenshot. If you encounter some error messages after you click on the "Test Agent Connection" button, that means the agent deployment is still in progress and still not yet completed. Do not proceed to the next step until this is completed.

Figure 9. Test Agent Connection
- Once agent deployment is completed on your servelet, when you click on the "Test Agent Connection", it will show that the server is successfully connected to the agent, and is successfully authenticated with the agent, as per below screenshot. Click "OK".
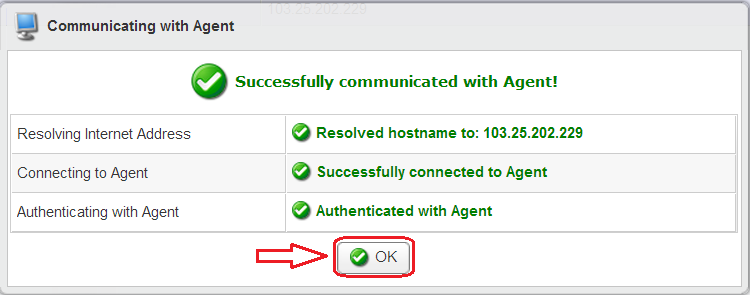
Figure 10. Test Agent Connection result
- The "Test Agent Connection" task retrieved some servelet's Server Details such as Server Name, Host Name/IP Address, Server Type, Agent Version, OS Type etc.
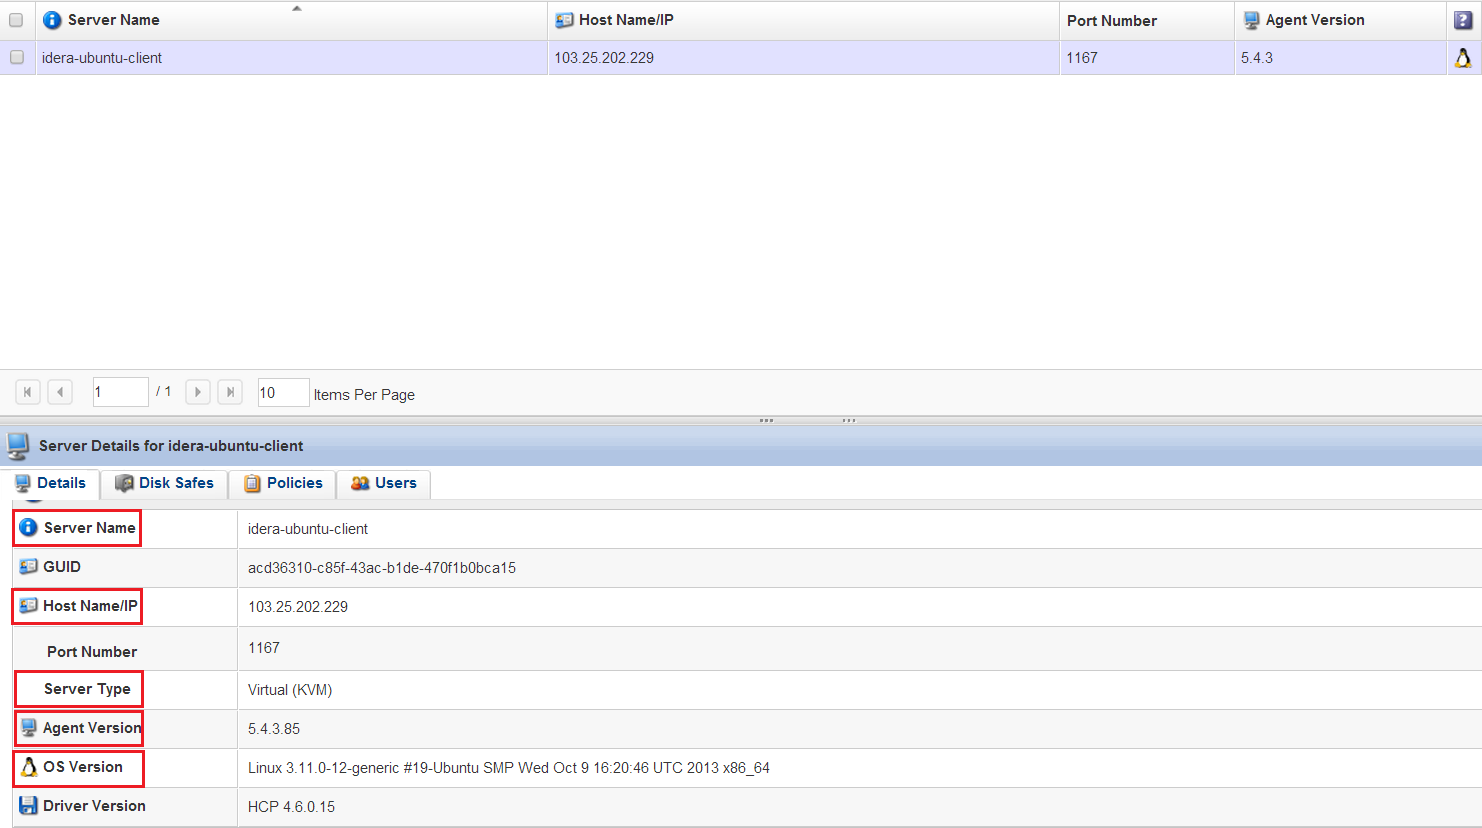
Figure 11. Servelet's Server Details
Was this article helpful?
☹Dislike0 ☺Like0
☹Dislike0 ☺Like0
Views: 1866