How to add your domain into your DNS Hosting service's control panel?
To add your domain into your DNS Hosting service's control panel, login to our portal: https://my.simplercloud.com/ and then go to Home > Services > DNS Hosting > DNS Hosting and then click on "Add Domain". You will see a page as per below screenshot.
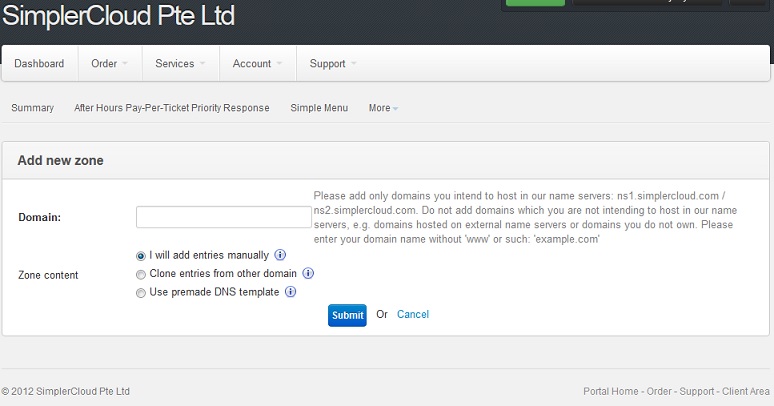
Key in the domain name you want to add. It should be the main domain name (e.g. company.com) and not the subdomain (e.g. www.company.com) unless if you are sure what you are doing. There are 3 ways on how you populate the zone records content for the domain:
- I will add entries manually
- Clone entries from other domain (this option only appear if you have an existing domain hosted under your DNS Hosting service)
- Use premade DNS template
1. I will add entries manually
If you select this option, no entries will be added under the newly inserted domain. The records will be empty except the records for the two name servers, for example:
company-test.com IN NS ns1.simplercloud.com
company-test.com IN NS ns2.simplercloud.com
See the screenshot below.
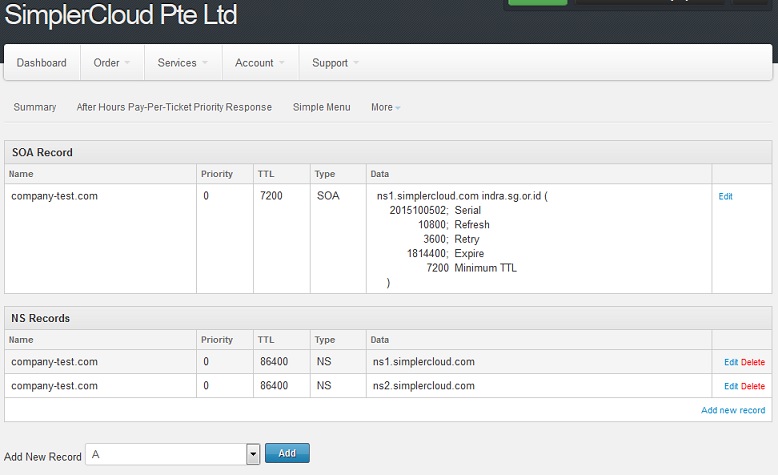
You would then need to add the DNS records manually. Use the "Add New Record" function to create the new A, MX or CNAME records as per your requirements. See below screenshot for an example on how you add a new A record:
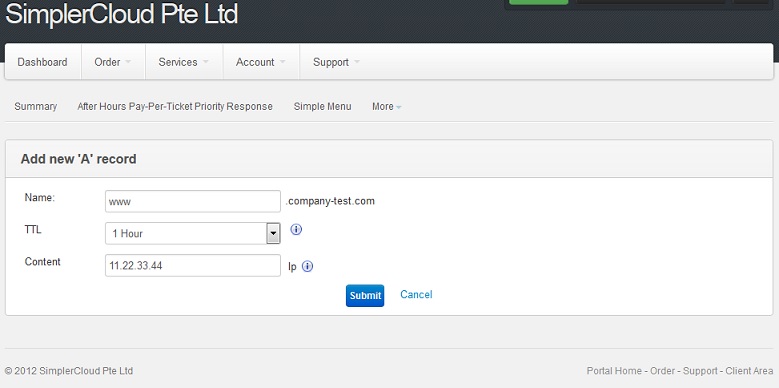
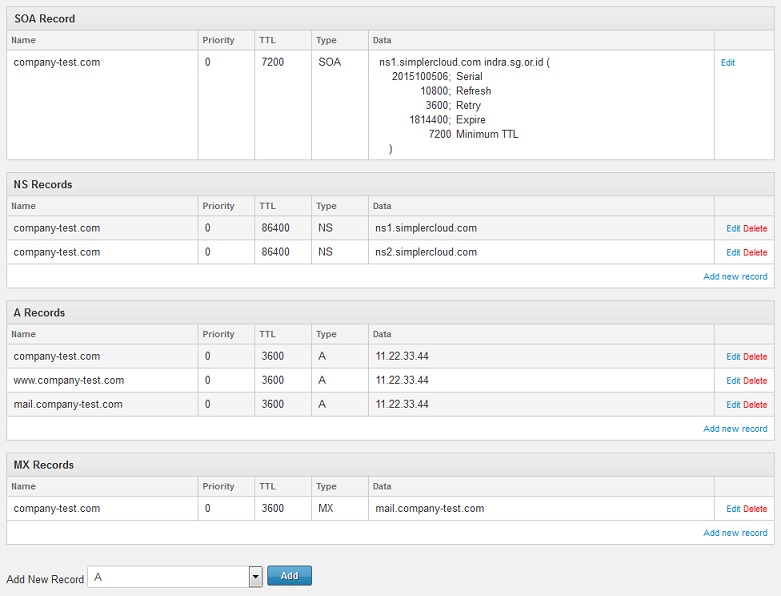
For a basic web and email hosting setup, normally below records are sufficient. For example, if your mail and website are hosted on this IP address: 11.22.33.44
company-test.com IN A 11.22.33.44
www.company-test.com IN A 11.22.33.44
mail.company-test.com IN A 11.22.33.44
company-test.com IN MX mail.company-test.com
See below screenshot on the example.
2. Clone entries from other domain
This option is only available if you have an existing domain hosted under your DNS Hosting service. This option is very useful if you want to add multiple domains with the same DNS records configuration and information, for example, if all the domains are pointed to the same IP address within your servelet.
Here is the screenshot if you are selecting this option:
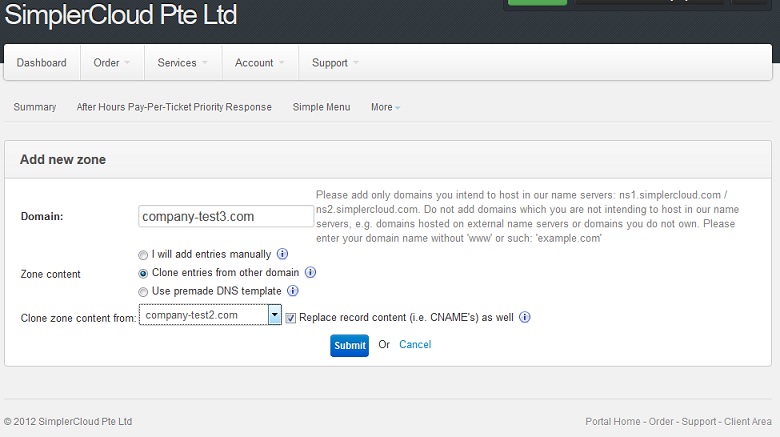
Key in the domain you want to add, and then select the source domain where you want to clone the zone content from. Click on "Submit".
3. Use premade DNS template
You can select this option to populate your newly inserted domain with the common records used for web and email hosting templates. Please select: "Common web-hosting template" as per below screenshot.
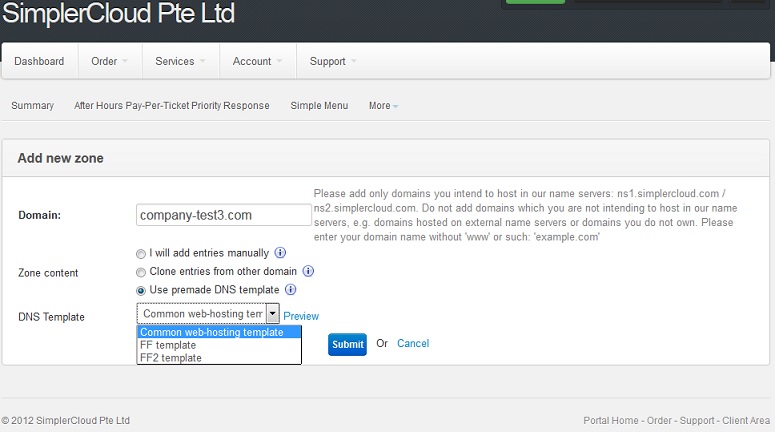
When you are selecting this "Common web-hosting template" option, all the common DNS records required for web and email hosting will be automatically added. However, the domain is being pointed by default to a private IP address: 192.168.1.2, which you would need to change to the actual IP address of your servelet. See screenshot below.
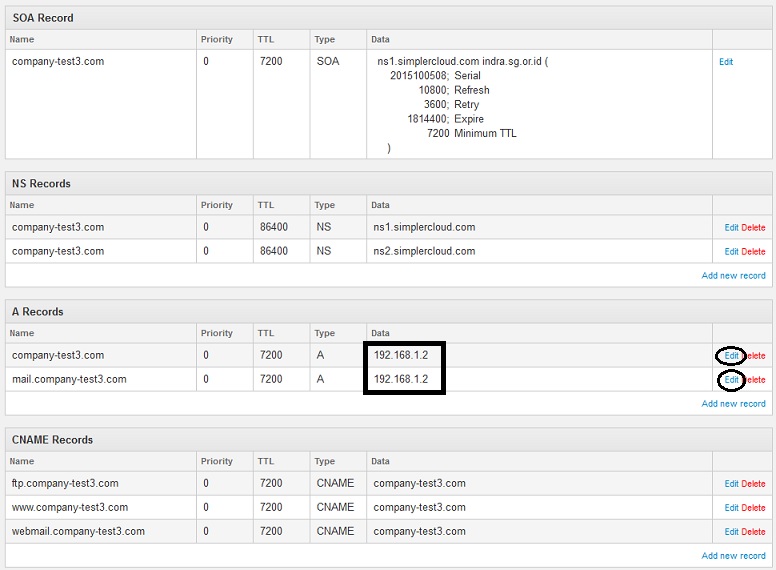
To change the IP address to the actual IP address of your servelet, click on the "Edit" hyperlink on the right side.
☹Dislike0 ☺Like0
 ??
?? English
 Bahasa Indonesia
 ???
??? Espanol