How can I initialise the data-disk on Windows Server 2016 servelet?
On Windows Server 2016 OS template, the data-disk is not initialised automatically by default. Therefore, you would need to initialise the data-disk after a Windows Server 2016 servelet creation, before you can use the drive. Below are the step-by-step instructions on how to do it
Notes:
- You may refer to this article on the difference between root-disk and data-disk on your servelet.
- You may open a support ticket with us if you would like to get our assistance in initializing the data-disk for you at no additional costs.
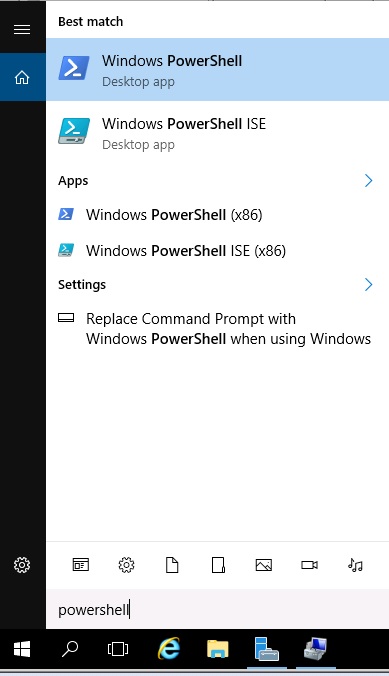
1. Login to your Windows Server 2016 servelet using Remote Desktop Connection. Click on the "Search" function and look for "Windows PowerShell". Execute the program.

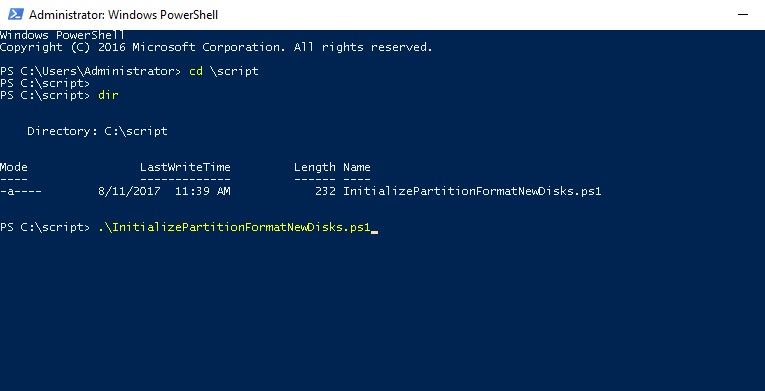
2. Once you are inside the Windows PowerShell window, type:
cd \script
to go to the C:\Script folder.

3. There is a PowerShell script file called "InitializePartitionFormatNewDisks.ps1" within the folder. Run the script by running below command:
.\InitializePartitionFormatNewDisks.ps1

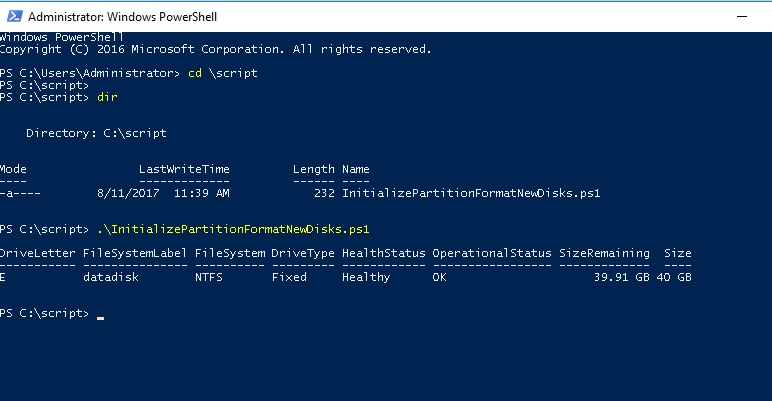
4. The data-disk initialization will commence, and once completed, you will see the outcome as per screenshot below.

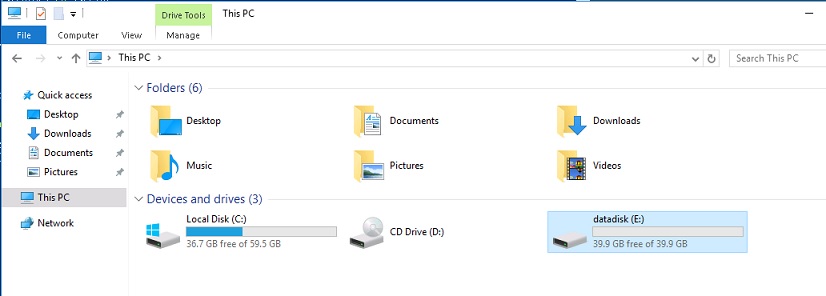
5. Exit from PowerShell window by typing "exit" and press Enter. You can go to Windows Explorer to verify that the data-disk has been initialized and formatted, and assigned the E: drive letter. You can start using the disk to install your applications and store your data.

☹Dislike1 ☺Like0
 ??
?? English
 Bahasa Indonesia
 ???
??? Espanol