How to configure your Windows 7 workstation to connect to the VPN on your VPC?
Note: This article outlines how you can configure your Windows 7 workstation (running Windows 7 operating system) to connect to your VPN on your VPC. If you are using Windows 10 operating system, please refer to this article instead.
===
To configure your Windows 7 workstation to connect to the VPN on your VPC, you need to take note of the information that you have gathered during the VPN setup:
- IP address of the VPN
- IPsec preshared key
- Username
- Password
Note that you can use Windows' built-in VPN client for this purpose. Below information is based on a Windows 7 Professsional workstation. The steps might be slightly different on different version of Windows.
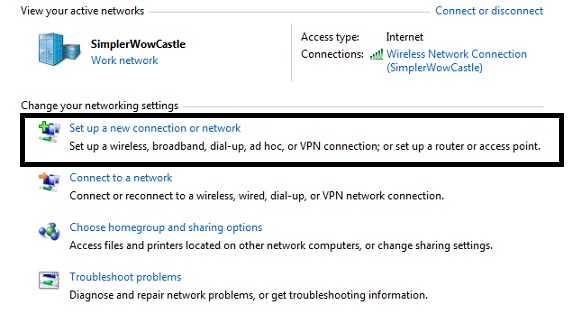
On your Windows 7 workstation, go to Control Panel, then select Network and Sharing center. Click "Setup a new connection or network".
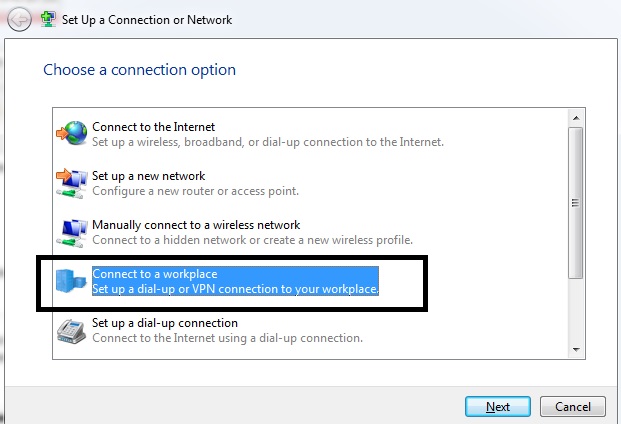
In the next dialog, select "Connect to a workplace - Set up a dial-up or VPN connection to your workplace"
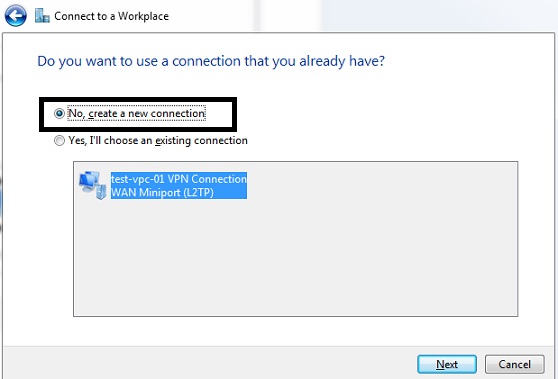
In the next dialog, select "No, create a new connection".
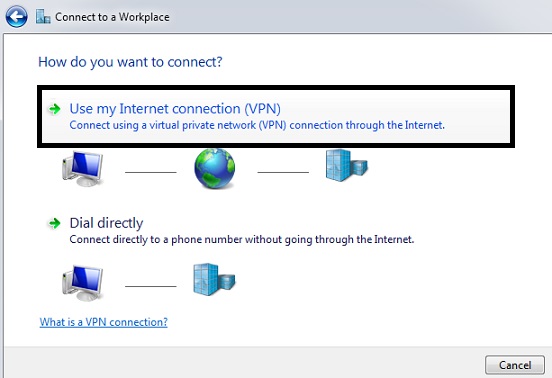
In the next dialog, select "Use my Internet Connection (VPN)".
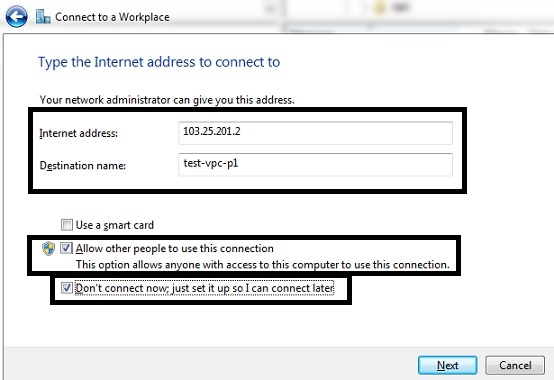
In the next dialog, enter the public IP address of your VPN under "Internet address", and give the connection a name under "Destination name".
Please check the option "Allow other people to use this connection" to allow other users within your workstation to also use the VPN connection. This setting is required if you need to establish this VPN connection to join a remote Active Directory (AD) domain on your VPC, and you need to use the VPN connection to log in to the domain.
Please also check the option "Don't connect now; just set it up so I can connect later". Click "Next".
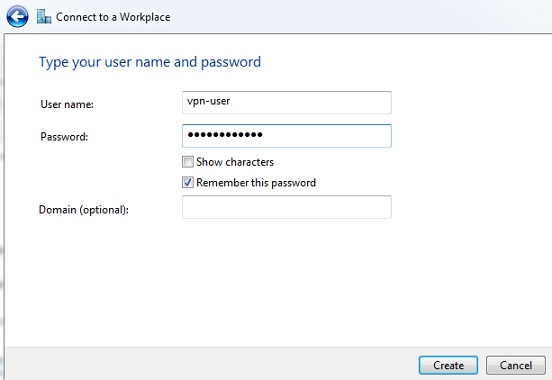
In the next dialog, enter the username and password of your VPN.
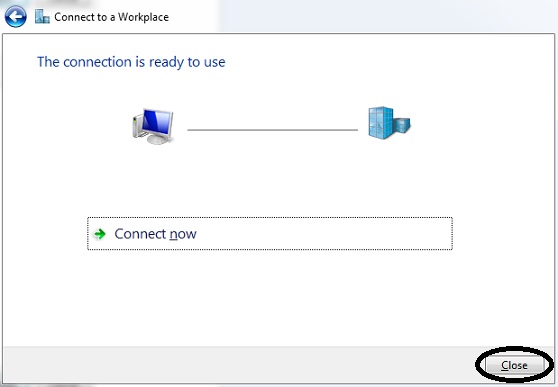
Click Create. You will see a window stating that the connection is ready to use. Don't click on "Connect Now", instead click on "Close".
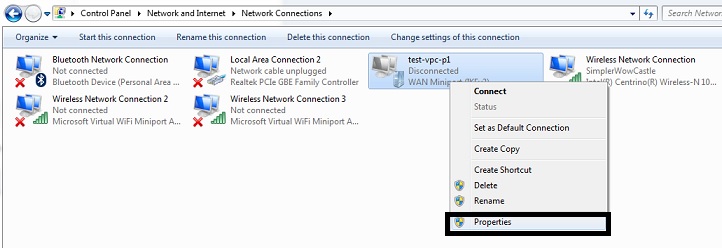
Go back to the Control Panel > Network and Sharing Center and click on "Change adapter settings" / "Network Connections" to see the new connection. The connection is not active yet, still in "Disconnected" state. Right-click the new connection and select Properties.
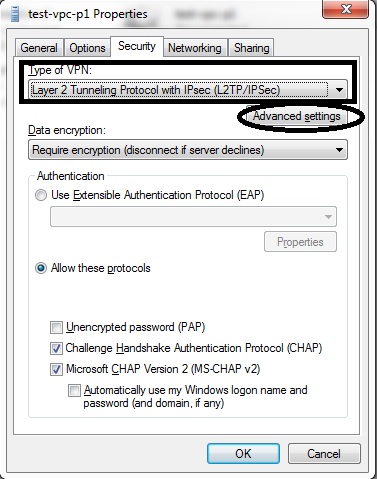
In the Properties dialog, select the "Security" tab. In "Type of VPN" option, select "Layer 2 Tunneling Protocol with IPsec (L2TP/IPsec), and click on Advanced Settings.
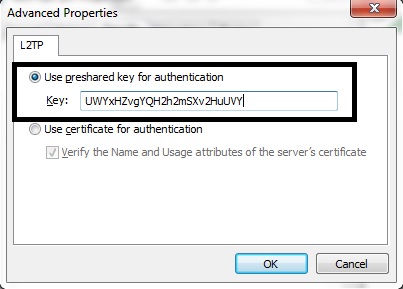
Under Advanced Properties, select "Use preshared key for authentication". Key in the IPsec preshared key that you obtain when setting up the VPN, and then click "OK".
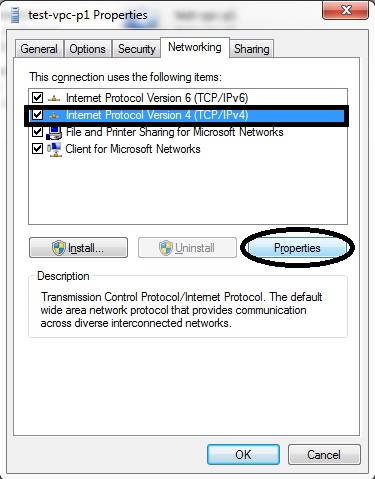
Back to the VPN Properties, go to "Networking" tab, select Internet Protocol version 4 (TCP/IPv4) and then click Properties.
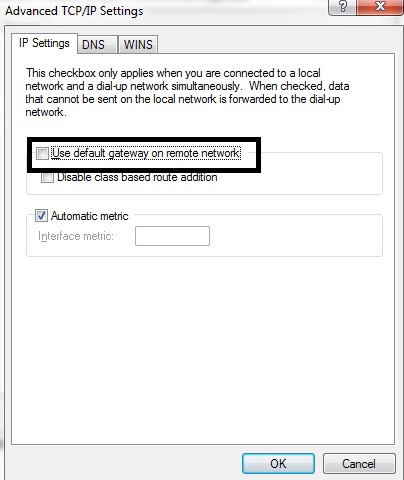
Under TCP/IPv4 Properties, click on Advanced, and then ensure that "Use default gateway on remote network" is un-checked. This is to ensure that you can still access the Internet using your own Internet connection while connected to your VPC network through the VPN. Click OK.
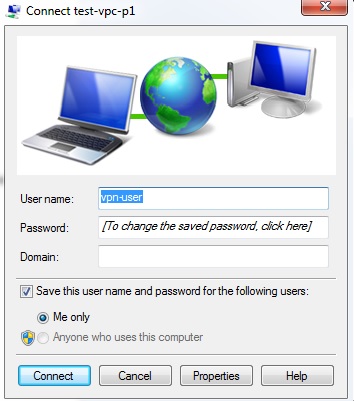
The connection is ready for activation. Go back to Control Panel -> Network Connections and double-click the created connection. Enter the VPN username and password, and then click "Connect".
☹Dislike0 ☺Like0
 ??
?? English
 Bahasa Indonesia
 ???
??? Espanol